
How to set up NextAuth.js in Next Js 13 using the app directory.
Are you looking to add robust authentication capabilities to your Next.js 13 application? Look no further! In this comprehensive tutorial, we will guide you through the process of setting up NextAuth.js using the app directory in Next.js 13. By leveraging the power of NextAuth.js, you can effortlessly implement authentication features that enhance your app's security while maintaining a smooth user experience.
First setup your next js 13 project.
npx create-next-app@latest mynextappAnd then install next-auth
npm install next-auth1. Set up the next-auth folder structure in Next 13.
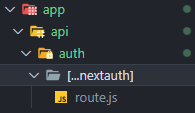
Inside the app directory in next 13 you will have to create an a folder called api, another folder inside the api folder called auth, and another folder inside the auth folder named [...nextauth] and finally a file named route.js. As shown below.
2. Step up route.js file.
Here you will need to include all the providers you will need to use in your app but in this guild we are going to use only the google provider. As shown below.
import NextAuth from "next-auth";
import GoogleProvider from "next-auth/providers/google";
const handler = NextAuth({
providers: [
GoogleProvider({
clientId: process.env.GOOGLE_ID,
clientSecret: process.env.GOOGLE_SECRET,
}),
],
secret: process.env.NEXTAUTH_SECRET,
});
export { handler as GET, handler as POST };Do not worry about the client id and client secret we will set that up next.
3. Register our app and get Auth0 credentials.
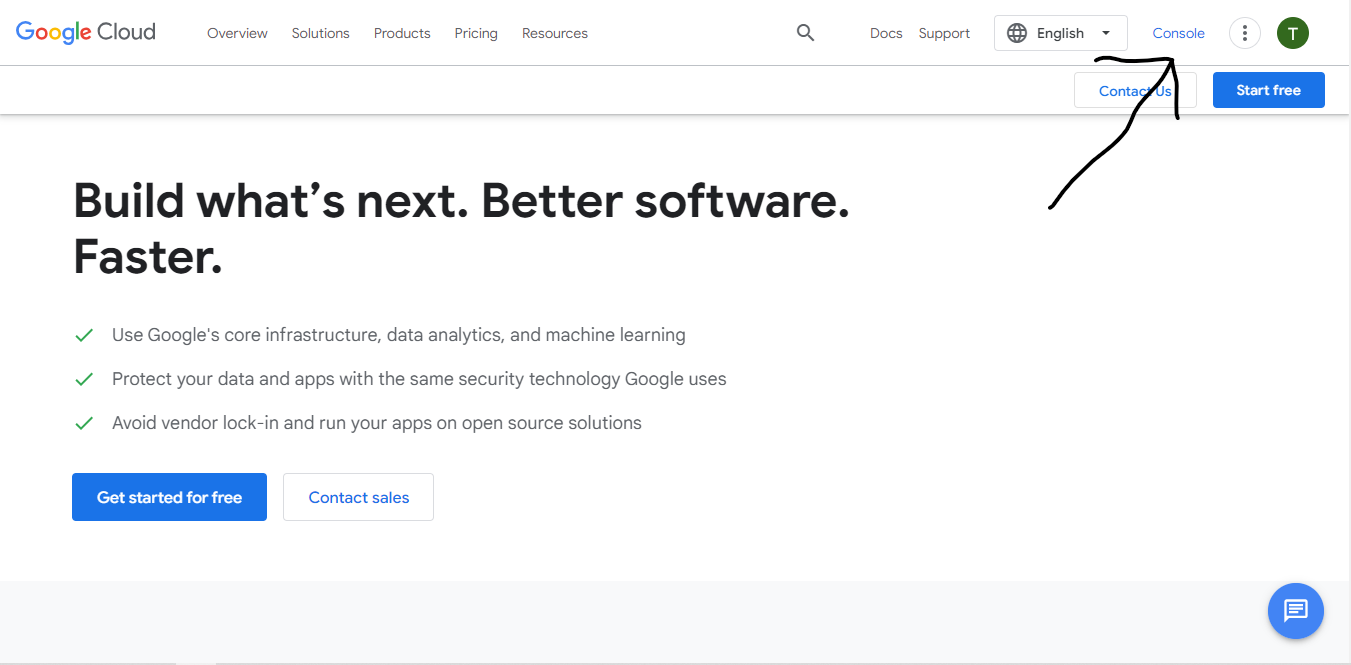
a. Visit google cloud platform here and login in to get started. And go to the console.
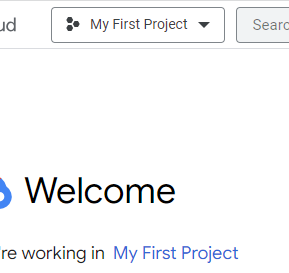
b. Create a new project
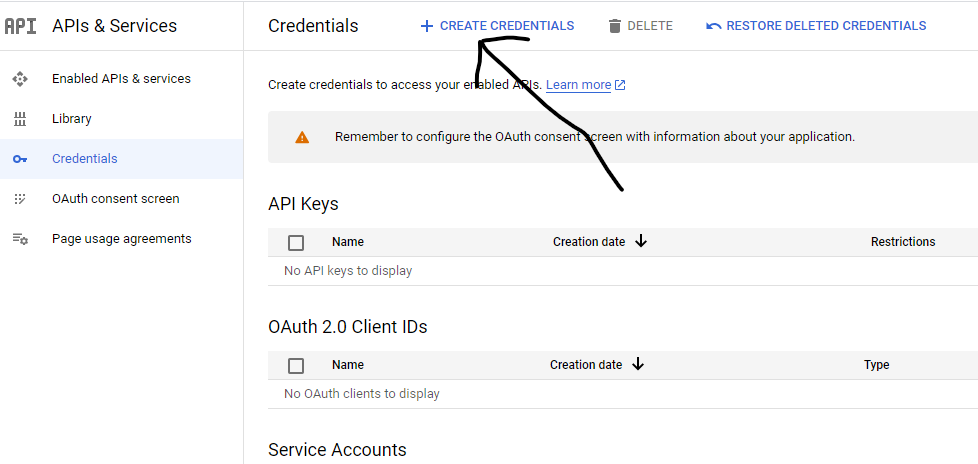
c. Scroll down and go to api and services and then credentials to create the 0Auth client ID credentials.
d. Config the consent screen with the necessary such as name and email and leave the rest.
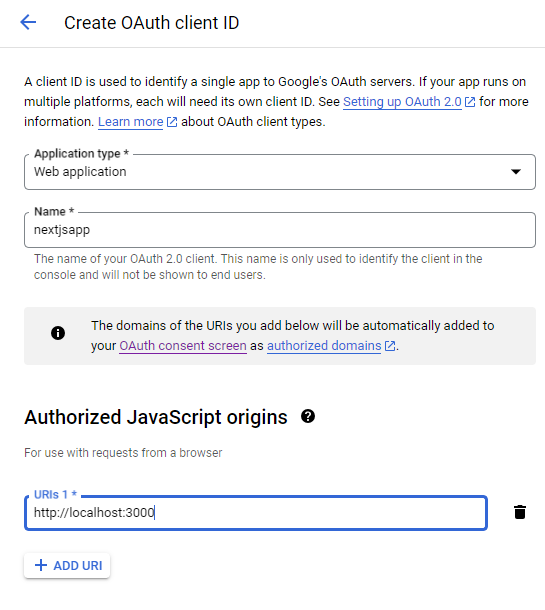
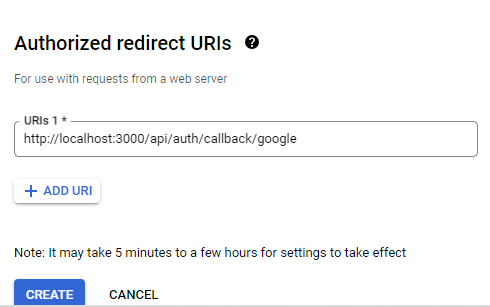
The redirect uri for development is http://localhost:3000/api/auth/callback/google. It may change in production with your domain name.
4. Copy the client ID and client secret ID in and .env.local file.
You will need to create a .env.local file and the route of your project and paste the client ids you got from the google cloud platform like so. You will need to restart your development server after editing the .env file.

# Authentication
GOOGLE_ID=38995402652_atc0kd7uga1eo8yae0f33pqul9nal.apps.googleusercontent.com
GOOGLE_SECRET=GOCSPX-9mXC749_1A08gquyqZemaoiqh5. Wrap your entire app in session provider.
You have to create a file in the app folder and name it for example, ProviderWrapper.js and add the following code to it.
"use client";
import { SessionProvider } from "next-auth/react";
export default function ProviderWrapper({ children }) {
return (
<SessionProvider>{children}</SessionProvider>
);
}You then have to import it in the root layout component in the app folder and wrap your entire app with it like so.
import "./globals.css";
import { Inter } from "next/font/google";
import ProviderWrapper from "./ProviderWrapper";
const inter = Inter({ subsets: ["latin"] });
export const metadata = {
title: "my next app",
description: "Generated by create next app",
};
export default function RootLayout({ children }) {
return (
<html lang="en">
<body className={inter.className}>
<ProviderWrapper>{children}</ProviderWrapper>
</body>
</html>
);
}6. Create a login component to test everything out.
We are all done setting up all the necessary information, all that is left to do is create a login component to test it all out. Create a components folder and a file Login.jsx as such.
"use client";
import Image from "next/image";
import { signIn, signOut, useSession } from "next-auth/react";
const Login = () => {
const { data: session } = useSession();
return (
<div className="flex flex-col items-center justify-center h-screen">
{console.log(session?.user.image)}
{session && (
<>
<Image src={session.user.image} alt="img" width={50} height={50} />
<p>{session.user.name}</p>
<p>{session.user.email}</p>
</>
)}
{!session && (
<button
onClick={() => signIn()}
className="p-2 my-2 bg-blue-500 text-white"
>
Signin with google
</button>
)}
{session && (
<button
onClick={() => signOut()}
className="p-2 bg-blue-500 my-2 text-white"
>
Sign out
</button>
)}
</div>
);
};
export default Login;Code Explanation.
- Importing necessary dependencies:
- Image component from the next/image module: This allows for optimized image loading in Next.js applications.
- signIn, signOut, and useSession from the next-auth/react module: These are helper functions and hooks provided by NextAuth.js for authentication and session management.
- Defining the Login component:
- Login is a functional component written as an arrow function.
- Using the useSession hook:
- useSession is a custom hook provided by NextAuth.js. It returns the session object containing information about the authenticated user.
- The syntax { data: session } uses object destructuring to extract the data property from the returned object and rename it as session.
- This line of code allows you to access the session object using the session variable.
- Rendering the component:
- The component is wrapped in a <div> element with the tailwind classes "flex", "flex-col", "items-center", and "justify-center". This positions the content at the center of the screen.
- console.log(session?.user.image) logs the user's image to the console. You will have to add the image base url to next config.
- Conditional rendering is used to display different content based on the presence of the session object.
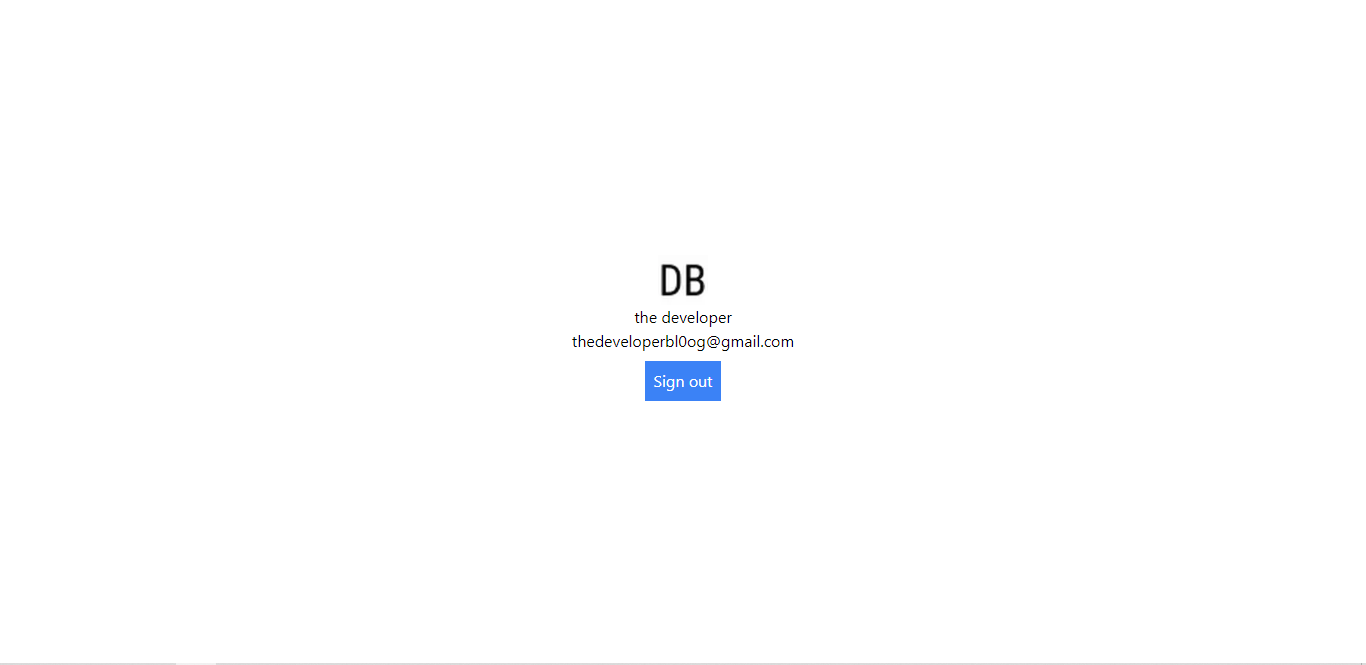
- If session exists:
- An <Image> component is rendered, displaying the user's image with the specified width and height.
- <p> elements display the user's name and email.
- If session does not exist:
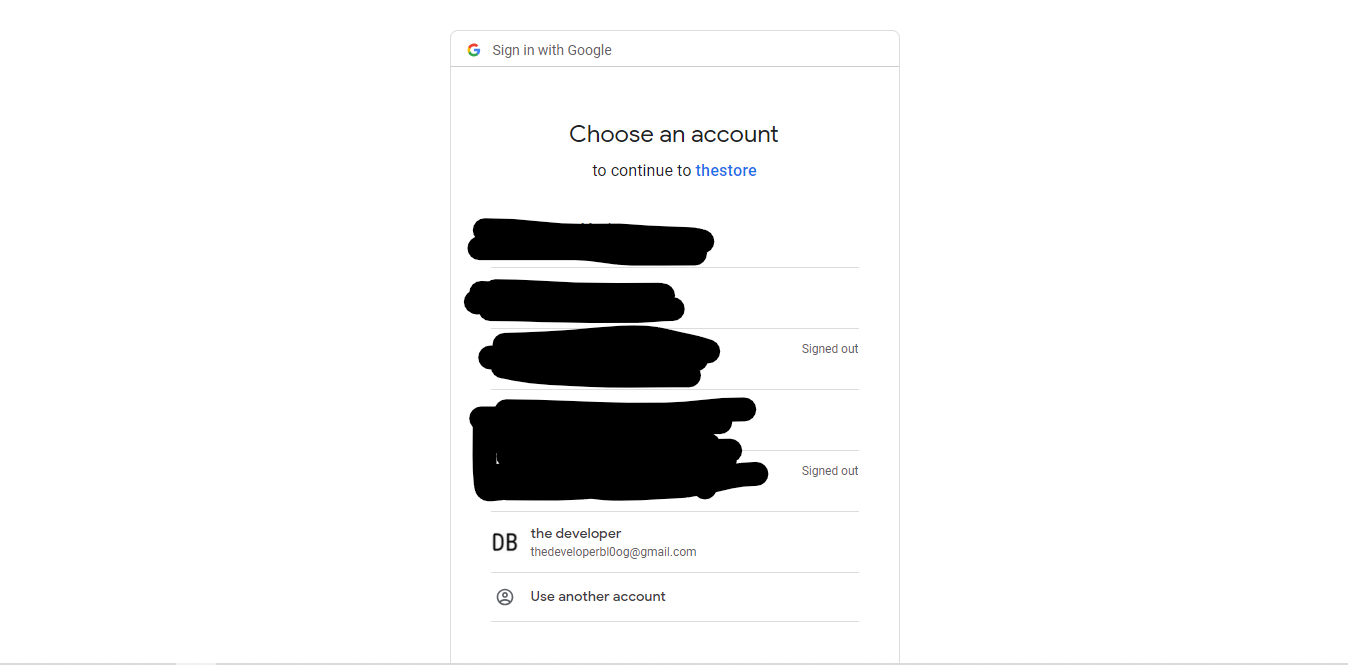
- A button is rendered with an onClick event that triggers the signIn function.
- If session exists:
- If session exists, a second button is rendered with an onClick event that triggers the signOut function.
If everything was done correctly it should work as shown below.
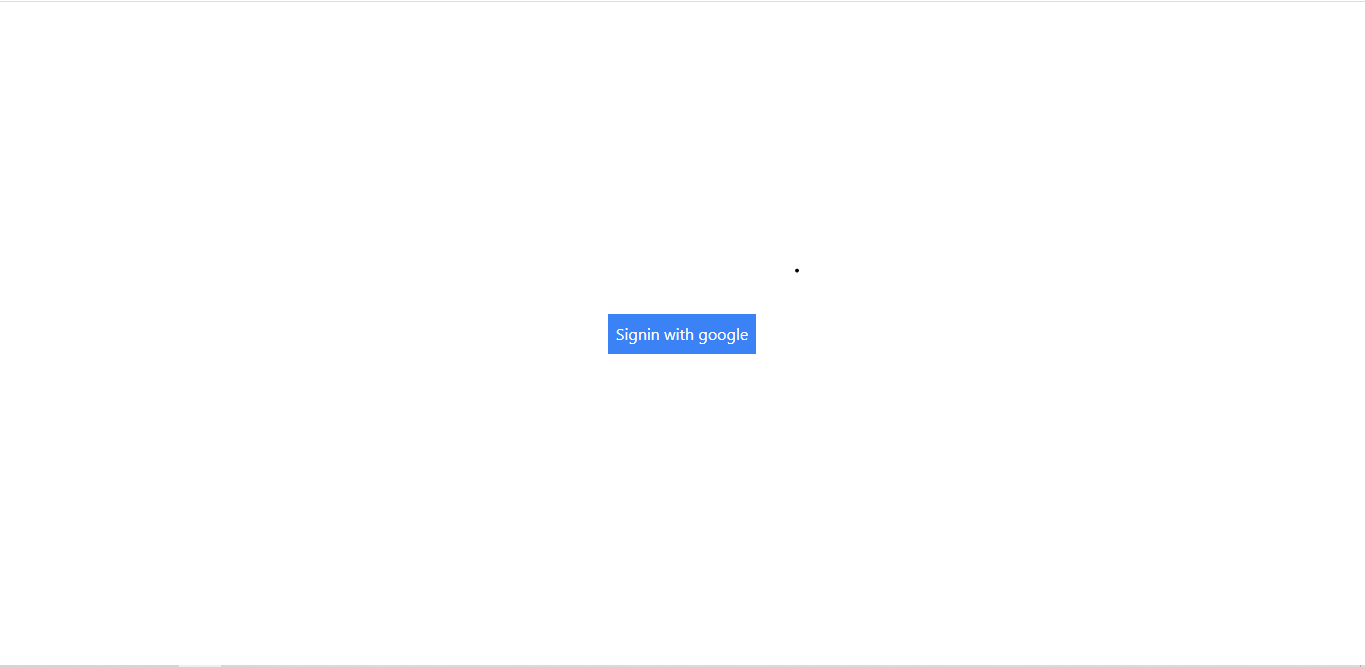
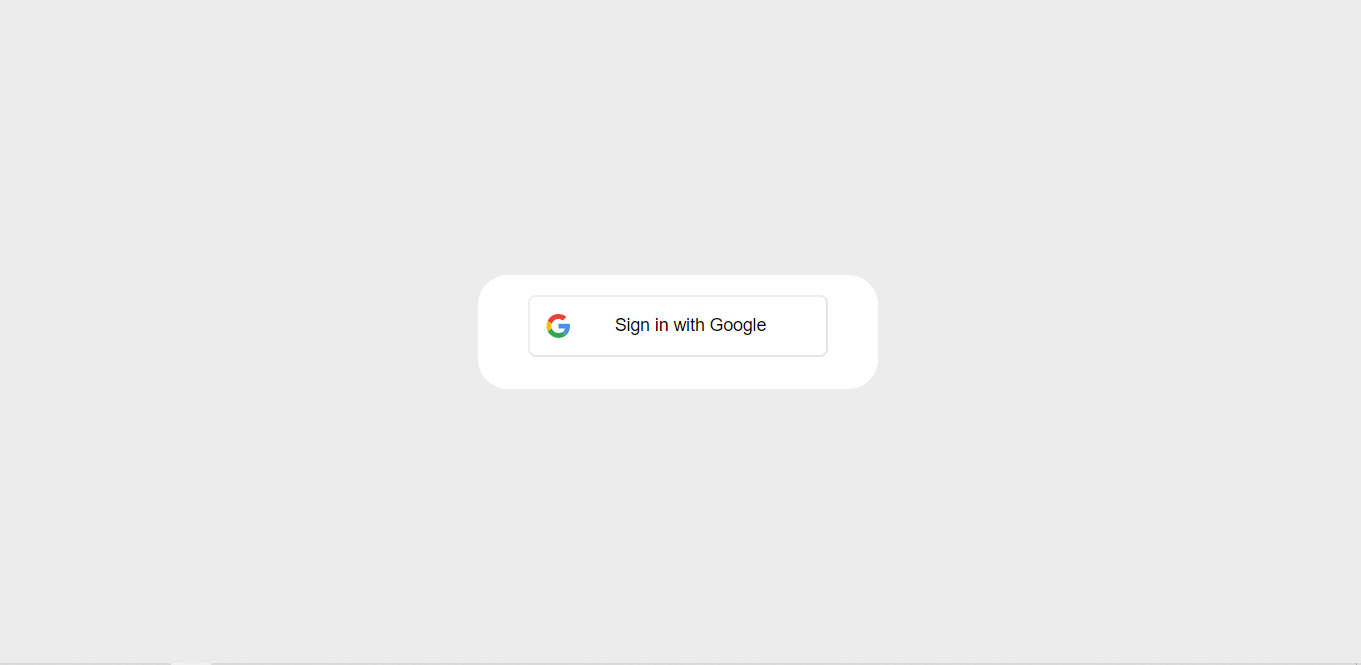
After clicking.
In this tutorial, we have walked you through the step-by-step process of integrating NextAuth.js into your Next.js 13 application using the app directory. By following our instructions, you now have a solid foundation for implementing secure and efficient authentication in your app. NextAuth.js provides the flexibility to adapt to various authentication providers, giving your users a seamless and secure authentication experience. Now it's time to take your Next.js 13 application to the next level by incorporating NextAuth.js and enhancing its security.
Found this article helpful? leave a comment down below.

comments
Add a comment...